Wednesday, April 29, 2009

142. Chocolate Truffles (p. 696)

Secretary's Day was last week, and I wanted to do something a little bit out of the ordinary for the person who helps me keep it all together at work. So, while other folks in my office gave their secretaries flowers and wine, I made these home made these chocolate truffles for my secretary.
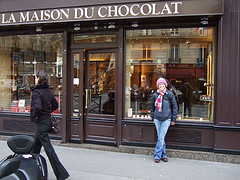
This recipe comes from Robert Linxe of La Maison du Chocolate in Paris.

There are only three ingredients in this recipe: chocolate, cream and cocoa powder. The Book is very particular about the particular brand of chocolate and cocoa to use. Apparently, Linxe uses Valrhona chocolate, and editors of The Book "didn't even think about substituting a more widely available chocolate." Well, I couldn't find Valrhona, and anyway, I've noticed that in recent years, grocery stores have been stocking more and more varieties of premium chocolate with various percentages of cacao. So, I went with Ghirardelli, and I was still very happy with the results.

First, I finely chopped some of the chocolate and put it in a Pyrex bowl. Then I brought some cream to a boil and poured it over the chocolate. I slowly stirred it until the chocolate melted and it was a smooth genache. The Book says to be careful not to stir too fast to avoid incorporating any air into the mixture. I let the genache stand for about an hour until a spoonful scooped from the bowl kept its shape. Then I lined a baking sheet with parchment paper and spooned the ganache into a pastry bag. I piped little mounds of the genache onto the baking sheet and put it in the freezer for a little while.

After the genache set, I melted some more chocolate in a metal bowl set over a saucepan of boiling water. I put some Ggirardelli cocoa powder in a bowl and got myself organized for some candy making. First I put on a pair of disposable plastic gloves. Next, I smeared some of the melted chocolate on one of the gloves. Working one at a time, I rubbed each of the ganache balls with some melted chocolate and dropped them into the bowl of cocoa. I gently lifted the truffles out of the cocoa with a fork and put them into a sieve and carefully tapped off the excess cocoa. I kept working until I had finished all of the truffles and until I was up to my eyebrows in chocolate. Seriously, these truffles are are not particularly difficult to make, but they are messy!

Since I made these as a gift, I was only able to sample a couple of them. And the few that I did eat were amazing. The first thing that you taste is the intense, earthy flavor of the cocoa power. Next, there's the slight crackle of the thin layer of hardened chocolate surrounding the filling. And finally, there's the cool, creamy, rich and velvetly genache. This is a truly luxurious treat. Well worth the effort for a special occaion or a special person.

Curiously, The Book specifically says that you should not try to double this recipe. If you want more, and I do want more, you should make two batches.

Date Cooked: April 19, 2009
Degree of Difficulty: Medium
Rating: A

Tuesday, April 28, 2009

141. Roasted Cauliflower with Garlic (p. 530)

I've been hearing a lot about Twitter lately. It seems like just about everyone's on it. Now, I've jumped in with both feet into blogging (obviously), and I'm a fan of Facebook for keeping in touch with friends and family. But, I just don't "get" Twitter. Well, today, I came across an interesting article in the New York Times about a woman in Ireland who's come up with an entertaining, if not entirely practical, use for Twitter's 140 character posts: micro-recipes.

Maureen Evans condenses her favorite recipes down to their barest essentials and somehow manages to get all of the measurements and directions crammed into just a few words. For example, here's her recipe for biscotti:
Biscotti: mix 1/3c sug/3T oil/egg/t anise flavr; +c flour/t bkgpwdr. Roll log to fit bkgpan; pat down. 30m@375/190C. Slice~14; brwn+6m/side.
So, I got to thinking, could I "tweet" this recipe? Here goes:
Roasted Cauliflower: Toss 6lb cauliflower florets/ ½ olive oil/ 4 cloves garlic/ s&p; spread on baking sheet; Roast @425F ~30m.
Nothing to it! 127 characters. In case you didn't get all of that, I cut 3 pounds of cauliflower (I halved the recipe) into florets. Then I tossed the florets with some olive oil, garlic and salt and pepper. I spread it all out on a baking sheet and roasted it for about a half hour. It really was that easy.

This was an excellent vegetable dish. The flavor was awesome. Nutty, sweet, garlicy, and buttery (even though there's not butter). Even if you think that you don't like cauliflower, you've got to try this one. It's that good!

Date Cooked: April 26, 2009
Degree of Difficulty: Easy
Rating: A

Monday, April 27, 2009

140. Sushi-Roll Rice Salad (p. 151)

The Book calls this recipe a "deconstructed sushi roll." It could also be called a "California Roll in a Bowl."

First, the rice. After all, "sushi" means vinegar rice. I rinsed some sushi rice (medium-grain Japanese rice) in a few changes of water, and then I put it in a sieve to drain. Then, I combined it with some water in a pot, brought it to a boil, cooked it for a few minutes, and then took it off the heat to stand, covered, for a while longer. The short cooking time, plus the longer steaming time off the heat results in a tender, chewy sushi rice with just the right amount of stickiness. While the rice was sitting, I brought some rice vinegar, sugar and salt to boil in a small saucepan just long enough to dissolve all of the sugar. Then I spread the rice into a shallow baking dish and sprinkled the vinegar mixture over it and tossed it with a little wooden paddle that someone gave us in a "sushi kit." The step of spreading the rice in a baking dish and gently sprinkling it with the vinegar might seem like unnecessary overkill, but I remember seeing something on TV once about how sushi is made, and the cooling and seasoning of the rice is apparently a very important part of its taste and texture. I think that it would be a mistake to just dump the vinegar into the pot of rice and start stirring away.

Next, the vegetables. First, using a vegetable peeler, I made some very thin carrot slices, which I then cut into diagonal strips (sounds like a pain, but it only took a couple of minutes). Next, I chopped some scallions and seedless cucumber. (The Book's instruction to "seed" the "seedless" cucumber struck me as a bit odd, but maybe that's just me.)

To make the dressing, I whisked together some wasabi paste, water and canola oil in a large bowl. (As I've noted a couple of times, I'm cooking dairy/soy/gluten free these days. I made my own wasabi paste using wasabi powder and water because the prepared wasabi paste contained "lactose." Also, The Book calls for "vegetable oil," but if you read the lables, every brand of "vegetable oil" is 100% "soybean oil." So, I used canola instead.) Then I added the rice, carrots, cucumber, scallion and some chopped pickled ginger and toasted sesame seeds. I tossed it all together and topped it off with sliced avacado, and a sprinking of nori "confetti" that I cut with kitchen shears from a sheet of toasted nori.

The Book suggests using fresh shiso leaves to plate the salad. That would make a dramatic presentation, but this was just a casual Sunday night dinner at home, and it probably would have required a trip to the Super 88 Market in Boston's Chinatown (the only place I know of to get Aisan produce). So, I skipped them.

This dish was a nice surprise. It was delicious and pretty, too. We really liked the taste of the rice with the nice crunch of the cucumbers and carrots. The rich and creamy avacado (perfectly ripe!) was the perfect contrast to the crispness. The rice was tender with the right mix of sweet and sour (sugar/vinegar balance). It really tasted like an unrolled California roll. The only thing missing was the imitation crab meat, but that's my least favorite part of California rolls anyway.

Date Cooked: April 19, 2009
Degree of Difficulty: Medium
Rating: A-

Saturday, April 25, 2009

139. Matzo Brei (p. 630)

A few months ago, I read Ruth Reichl's book Garlic and Sapphires. It's the story of Ruth's time as the restaurant critic at The New York Times. Like a lot of people, I've fantasized about being a food critic, but as Ruth's book shows, it's not as glamorous as it seems. Sure, you get to eat out at fancy restaurants like Le Cirque and Daniel (and somebody else pays for it!), but eating out almost every night means that you miss a lot of meals with your kids. And as a new father who usually gets home after my son is asleep, I understand how difficult that can be. There's a touching scene in the book when Ruth gets home after a lousy meal at a highfaluten restaurant, and for some reason, her son is still up. She whips up a batch of Matzo Brei and has, what I think she might agree was the best meal that she wrote about in the book.

Ever since I read that book, I've been looking forward to making this recipe. I had some matzos leftover from the Haroseth that I made, so, last Saturday, I decided to make this for breakfast. First, I broke up a matzo into a sieve. (The Book calls for four, but I was only making half of the recipe, and my matzos were huge, about 7 inches square, so I couldn't see using two of them for one person.) I ran some cold water over the pieces to moisten them just a bit. Then I put the pieces in a bowl and added a couple of eggs and some salt and mixed it up with a fork. I heated a generous amount of butter in a pan and then added the egg and matzo mixture and cooked for a few minutes.

Now, as you can see from the picture above, this is not the prettiest thing that I've cooked so far in The Project, and I wasn't too impressed after the first bite. But, as I kept eating, I liked it more and more. The eggs were tender and buttery and the matzo gave it some substance and a nice crispiness.

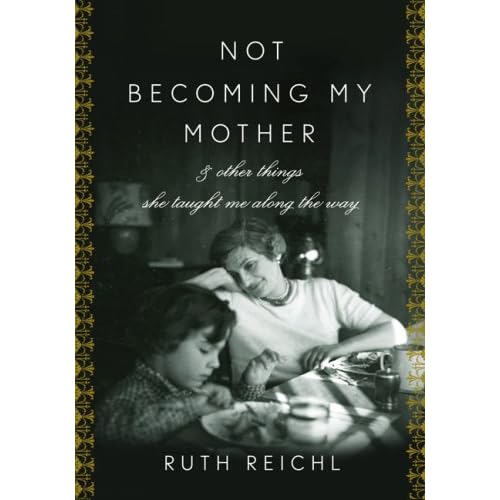
Speaking of Ruth Reichl, her new book, Not Becoming My Mother: and Other Things She Taught Me Along the Way, was published last week. The description on Amazon calls it "a clear-eyed, openhearted investigation of her mother’s life" drawing from her mother’s letters and diaries. Ruth sometimes talks about her mother, and her cooking, in her letters from the editor in Gourmet, so I feel like I already have a little bit of a sense of what Ruth's mother was like. I'm looking forward to reading the book and getting to know her better. Ruth's going on a book tour to promote the book, and it'll be bringing her to a few cities in my neck of the woods. I'm hoping to make it to one of the events, and who knows, maybe I can even convince her to sign my copy of The Gourmet Cookbook.

Date Cooked: April 18, 2009
Degree of Difficulty: Easy
Rating: B+

Tuesday, April 21, 2009

138. Deviled Ham (p. 496)

Please don't read anything into the fact that I've done two posts in a row about "deviled" foods. I haven't lost my moral compass or gone over to the dark side. It's just that I ended up with a ton of leftover ham from Easter dinner, and needed to find something to do with it. This recipe* was a perfect fit.

This is a very short recipe. Just four ingredients and only 27 words of instruction. Because I only skimmed those 27 words instead of reading them carefully, I made this simple recipe even easier by combining two of the steps. And do you know what, the finished product was none the worse for it. First I cut up the leftover ham into smallish chunks. I tossed them into my food processor along with some butter, Dijon mustard and mango chutney (The Book calls for Major Grey's, but I could only find some generic mango chutney). I whizzed it all up until it was finely chopped and a spreadable consistency. After I made this, I realized that I was supposed to chop the ham and whiz the dressing separately and then stir them together. Points for me for increased effeciency.

I spread some of this on crackers as a snack, and I've also been enjoying it on sandwiches for lunch this week. All in all, this was a pretty good use for leftover Easter ham. Another good use for leftover Easter ham is the Yellow Split Pea Soup that I'll post about next.

Date Cooked: April 18, 2009
Degree of Difficulty: Easy
Rating: B+

*This recipe is not on epicurious.com

Monday, April 20, 2009

137. Deviled Eggs (p. 27)

I suppose that there is something not quite right about making "deviled" eggs on Easter. After all, the word "deviled" has been used since the 1700s to describe firey foods based on the obvious connection between intense heat and the devil. But, eggs just seemed like something I should make on Easter, and deviled eggs are such a crowd-pleaser, I knew I couldn't go wrong by making these as an appetizer for the big family meal.

There really isn't too much to say about this recipe. I mean, it doesn't get any easier than this to make a fancy, yet familiar, and totally delicious appetizer. I hard-boiled a dozen eggs. (The Book calls for six, but I made twelve because I knew they'd go fast). I think I've mentioned this before, but it's worth saying again, the Book's method for cooking hard boiled eggs works every time to make a perfectly set egg and a brilliantly yellow yolk without a hint of green. Next, I cut the eggs in half and removed the yolks. I combined the yolks with some mayonnaise, Dijon mustard and a pinch of cayenne pepper. I piped the filling into the egg halves, sprinkled with some paprika and that's it!

These deviled eggs were perfect. The filling was creamy and delicious with just a touch of heat from the cayenne. I'll make these again and again. They're just as at home at a picnic as they are at a fancy cocktail party.

Date Cooked: April 11 - 12, 2009
Degree of Difficulty: Easy
Rating: A

Sunday, April 19, 2009

136. Hot Cross Buns (p. 617)

I'm always amazed at how traditions and superstitions develop over the years. I've always seen hot cross buns in the supermarket bakery around Easter time, but I had no idea what a storied history they have. According to The Oxford Companion to Food and Larousse Gastronomique, these buns are traditionally cooked in England on Good Friday, but they trace their history much further back to the Saxons, who cooked buns in honor of Eostre, the goddess of light, and marked them with an X to represent the four quarters of the moon. Well, it turns out that Easter takes its name from Eostre, and the tradition of making X-marked buns came along with the name.

There are also a number of superstitions associated with these buns. They say that hot cross buns cooked on Good Friday won't get moldy. If you hang one in your kitchen, it's supposed to protect against fire in the coming year. (It's a good thing that they're supposed to be mold-resistant, since hanging a moldy piece of bread from the kitchen ceiling doesn't seem like a good idea, even if it does prevent fires.)

This recipe was the first of the yeast breads from The Book that I've made. First I warmed some milk and put it in a bowl with some yeast and sugar and let it sit for a few minutes until it got nice and foamy. Meanwhile, I sifted together some flour, allspice, cinnamon, salt and some more sugar in a bowl. Using my fingers, I worked in some butter until it was the texture of coarse meal. Then I made a small well in the flour mixture and poured in beaten egg and the yeast mixture. I added some golden raisins, currants and lemon and orange zest and stirred it until a dough formed. Well, I actualy stirred it until I thought that my wooden spoon was going to break, and then I switched to mixing it with my hands.

I turned the dough out onto my plastic pastry mat and kneeded it for about ten minutes. I formed it into a ball and put it into a large oiled glass mixing bowl and let it rise for a while. Then I kneeded it a bit more and divided it in two. I formed each half into a log and cut each log into twelve pieces. I formed each piece into a ball and put them on cookie sheets and let them rise some more.

After they had risen for a while more, I brushed each bun with an egg-and-sugar glaze and made a cross on the top of each bun with two strips of Basic Pastry Dough. This last step is a bit controversial. Teena thought that the pie crust crosses were "absurd," and Melissa skipped this step altogether. Most of the commenters on epicurious.com made the crosses out of icing instead of pastry dough. But, since I'm trying to do this Project "by The Book" as much as possible, and because I wanted to see what all the fuss was about, I used pastry dough. Would I do it again? It's apparently very traditional to use pastry dough to make the crosses, but without any sugar in the dough, it doesn't add anything to the flavor of the bun, and because it's so flaky, it kind of crumbled and fell off the bun when we cut or tore them in half. If I make these again, I'll use icing.

Other than that, these were pretty good. Like Teena said, these buns are pretty dense, almost like a bagel. She found this to be a negative, but I liked that the buns were "substantial." I really liked the flavor. They were sweet, but not too sweet. The raisins and currants were sweet and chewey. The lemon and orange zest gave the buns a nice zing. As I was making these, I was a little nervous that the recipe calls for so much allspice, 1 1/2 teaspoons. That seemed like an awful lot to me, but I thought that the finished buns were just right.

I made these for Easter dinner, and (aside from some comments that they'd be better off without the pastry dough) they were a hit. I brought the leftovers to work the next day, and they went fast. (Ten seconds in the microwave does wonders for the leftover buns.)

Date Cooked: April 11, 2009
Degree of Difficulty: Medium
Rating: B+

Thursday, April 16, 2009

135. Chicken Long Rice (p. 247)

Mike Myers used to do a bit called "Coffee Talk" on Saturday Night Live. The character's name was Linda Richmond, and every now and then, when she got a little verklemmt, she'd pose an imponderable for the viewers to ponder while she tried to collect herself. A couple of examples are: "The Holy Roman Empire was neither holy, Roman nor an empire. Discuss." and "The peanut is neither a pea nor a nut. Discuss." Well this dish could be another Linda Richmond imponderable: "Chicken Long Rice is neither long nor is it rice. Discuss."

This recipe is a little like the Congee I made a while ago in that both start by making a simple stock and end with shredding the chicken you used to make the stock and adding to the finished dish. First, I simmered some chicken, ginger and salt in some water for about an hour to make the stock. The Book calls for whole chicken thighs, which would have been nice if I could have found some because thigh meat is really flavorful and the bones and skin would have added some depth to the quick broth. Unfortunately, my local mega-mart was totally out of chicken thighs. It was the day before Easter, and the store was a mad house. The meat department had all sorts of stuff that they don't usually carry: marrow bones, beef kidney, fowl, cornish hens and more hams than you could shake a stick at. But no chicken thighs. So, I used split chicken breasts. The result was that the broth wasn't as flavorful as I think it was supposed to be. But the tradeoff was that there was a lot more meat in the finished dish than there would have been otherwise.

After the broth was done cooking, I removed the chicken and set it aside to cool a bit before shredding it. I strained the stock and put it back into the rinsed-out pot. I added some more water, one and a half Knorr chicken bullion cubes, chopped onions, and four dried porcini mushrooms. (The Book calls for dried shitakes, but the mega-mart only had porcinis, and you make do with what you've got.) After I brought this to a boil I added some bean thread noodles broken up into pieces. I cooked it for a bit and then let it sit for a bit longer. Before serving, I added some chopped scallions and the shredded chicken.

So, as you can see, there is no rice to be found in this recipe, and since the bean threads are broken into pieces, there's nothing "long" about it. But even if it isn't really "long rice," it is good. The flavor is excellent. The bullion cubes and dried mushrooms have a lot to do with that. The chopped onions (which are not sauteed before they go into the pot) and the scallions give the dish a nice, fresh oniony flavor. If you've never had bean threads before, they do take a bit of getting used to. They're sometimes called cellophane noodles because when they're cooked, they're clear. They also have a squishy texture and an innate "worminess." If you can get past that (I have), you'll like this.

Date Cooked: April 11, 2009
Degree of Difficulty: Easy
Rating: B+

Wednesday, April 15, 2009

134. Tahini Sauce (p. 891)

I made this recipe as an accompaniment for the Falafel Pitas I made a little while ago. It was the best thing about the dish, and it was pretty easy to make.

The hardest part was stirring the tahini paste (which had been sitting in my refrigerator for I don't know how long). This sesame paste is pretty oily, and over time, that oil separates out and needs to be stirred back into the paste before you can use it. Like Melissa, I used a knife to carefully stir the paste so as to avoid making a huge, oily mess.

The rest of the recipe is a cinch. First, I mashed some minced garlic and sea salt into a paste with the side of a chef's knife. Then I whisked together the garlic paste with the tahini, some lemon juice, some water, olice oil, chopped parsley and cilantro and a little bit of cumin.

This sauce was delicious. It was fresh tasting with the bright lemon and pungent garlic. The tahani has a rich, silky texture, and the addition of fresh, chopped herbs was a nice touch.

I'll make this sauce again to go with some grilled chicken or drizzled over a salad, or as a lighter alternative to hummus.

Date Cooked: April 4, 2009
Degree of Difficulty: Easy
Rating: A-

Monday, April 13, 2009

133. Falafel Pitas (with Chopped Vegetable Salad) (p. 182)

I'm not sure what happened, but this recipe* was a failure. You can't really tell from the picture, but this dish didn't turn out at all like it was supposed to.

First, I ground some chickpeas in the food processor. The Book calls for dried chickpeas soaked for 24 hours. I used canned instead. This might have been a big mistake, but I don't see how this substitution could have caused the disaster that resulted in the end. Next, I blended in some scallions, parsley, garlic, salt, baking powder, cumin, coriander and cayenne. I let this mixture stand, covered with plastic wrap, for about a half hour. Then I formed the mixture into eighteen patties. The mixture seemed to have a good texture, and the patties held together just fine. I set the patties on a baking sheet lined with wax paper.

Next, I clipped my brand-new candy/deep frying thermometer to the side of a large saucepan, filled it with canola oil, and watched nervously as the mercury climbed toward 375 degrees. It took a while for the oil to heat up, and it made some strange clicking and hissing noises as it heated. I have to admit, this is only the second time that I've ever deep fried anything, and I was a little spooked by the ominous warning about grease fires on the Crisco oil label. I was almost sure that the oil was going to spontaneously ignite.

Well, it didn't spontaneously ignite, but it didn't do what it was supposed to, either. Once the thermometer registered 375, I put the first three falafels in the oil. It bubbled furiously, and after a minute, I put my slotted spoon in the oil to flip the falafels. The problem is, I couldn't find them. Instead of crisping up, the falafels had dissolved to nearly nothing in the hot oil. Totally disheartened, I made the snap decision to pull the plug on the deep frying and switch to pan frying. This wasn't much of an improvement. I was able to get some crispiness on the outside, but the patties just wouldn't cook through, and way I ended up with was what can only be described as crispy hummus. The flavor was fine (especially when drizzled with the tahini sauce that I'll write about in my next post), but the texture was very strange. I could only eat a couple of them. My wife (what a trooper!) even had leftovers for dinner the next night.

Like I said at the beginning of the post, I'm not sure what went wrong here. Maybe it was the canned chickpeas. But I think it is more likely that it was the oil not being hot enough. I plunged the first batch of falafels into the oil the second it reached the 375 degree mark. Maybe if I had let it get a little bit hotter, it would have crisped up the outside on contact, and then slowly cooked the patties through. I think, however, the next time I want a falfel (which isn't very often, since my food of choice at Middle-Eastern restaurants is baked kibbeh) I'll go to the take-out place down the street.

This recipe wasn't a total failure, though. The falafels are served with at Chopped Vegetable Salad, which is a sub-recipe to the main falafel recipe. It's finely chopped seeded tomatoes, green bell peppers, cucumbers, scallions and radishes in a light, lemony viniagrette. The salad was really good, and I just might make it on its own this summer for a cookout, or to go with some grilled meat for an easy dinner.

Date Cooked: April 4, 2009
Degree of Difficulty: Medium
Rating: D (falafel) B+ (chopped salad)

*This recipe isn't on epicurious.com

Thursday, April 9, 2009

132. Passover Sponge Cake with Apples (p. 711)

One of the things that I've enjoyed most about The Project is learning more about various cultures as I organize my cooking around the different holidays throughout the calendar. I've made Coquilles St. Jaques on Bastille Day and Crepes on Candlemas. The Book's excellent collection of Jewish dishes are a great example of how cooking can be a cultural education. I've made Honey Cake on Rosh Hashanah and Date Walnut Rugelach for Hanukka. I made this recipe, along with the Ashkenazic Haroseth, for Passover.

One of the most recognizable Passover traditions is the prohibition against consuming, or even possessing, chametz (fermented items leavened breads and cakes and most alcoholic beverages). That means no yeast breads, and depending upon the branch of Judiasm, no chemical leavners like baking soda and baking powder, either. This recipe relies on beaten egg whites to give it lift.

To make this cake, I first sifted together some matzo cake meal and some potato starch and set it aside. Next, I separated six eggs and beat the yolks with some sugar, lemon zest and juice and then I stirred in the cake meal mixture. After that, I cleaned the beaters and beat the egg whites (if you don't clean the beaters before beating the whites, any yolk left on the beaters will prevent the whites from beating properly). I added a little bit of sugar and kept beating until I got "stiff, glossy peaks." Then I folded the fluffy egg whites into the yolk-cake meal mixture.

To assemble the cake, I spread about a third of the batter into a springform pan. Then I put down a layer of thinly-sliced Golden Delicious apples and sprinkeld them with a generous amount of cinnamon and sugar. I added another layer of batter, another layer of apples, sugar and cinnamon, and a final layer of batter. I cooked it for about an hour and cooled and unmolded it.

The cake tasted pretty good. It was sweet and tender, if just a little bit chewey. It looked very nice when sliced with the pretty layers of apple slices and cinnamon. The only clue that this was a "Passover" cake was a very slight hint of that distinct matzo flavor.

I took this cake to work and left it in the kitchen in the morning. It went over pretty well. Just after lunch, there was only a small slice left. I was very disappointed, however, that the office cleaning lady threw away the bottom of my springform pan. Can you believe that!?! In her defense, she might have mistaken it for a disposable pie plate. I'm sure it wasn't malicious. But, the result is that I need a new nine-inch springform pan.

Date Cooked: April 5, 2009
Degree of Difficulty: Medium
Rating: B

Wednesday, April 8, 2009

131. Ashkenazic Haroseth (p. 902)

I'm not Jewish, but when I was a little boy, I attended a Jewish nursery school because it was only a few blocks from our house. Ever since I then, when we made construction-paper Seder Plates, I've had an interest in Jewish food and culture.

Haroseth, or charoset, is one of the six elements of the traditional Seder Plate. Each of the items on the plate recalls a part of the Jews' exodus from Egypt. This element, with its dark color, and pasty, pebbly texture, is meant to represent the mortar that the Jews used during their enslavement to build the storehouses of Egypt. Symbolism aside, this dish tastes nothing like mortar. In fact, it was pretty good. The Seder Plate has a reputation as being more of a traditional than a gastronomical experience. But, while the bitter herbs and shank bone don't seem that appealing, haroseth is said to be enjoyed libreally and is a favorite of children.

This recipe,* which comes from the Ashkenazi branch of Judiasm in Eastern Europe, combines chopped Macintosh apples, chopped walnuts, cinnamon, a pinch of salt, and a generous splash of Passover wine. Apparently these are all ingredients mentioned by King Solomon in The Song of Songs. All you do is combine the ingredients and let them sit in the refrigerator overnight to allow the flavors to develop. Serve it on matzos and enjoy!

The area I live in doesn't have a particularly large Jewish community, and I think that's why I had a tough time finding the ingredients for this recipe and the other Passover dish I made (a Passover Sponge Cake with Apples that I'll post about next). For this recipe, I was able to find matzos at my usual grocery store, but it wasn't until I got home that I noticed that they weren't "Kosher for Passover." Same with the Manischewitz wine I bought. The grocery store had just run out, so I went to the New Hampshire State Liquor Store. Under a handwritten sign that said "Kosher Wine for Passover" I found a few lonely bottles of Manischewitz Elderberry wine. The Book calls for the Concord Grape variety, but it was either Elderberry or nothing, and I figured that it was close enough. Well, when I got home and did a little bit of research, I learned that Elderberry is the only variety of Manischewitz that's not available "Kosher for Passover." Thankfully, I was looking for "Kosher for Passover" items for reasons of authenticity rather than religion. Otherwise, it would have been a real challenge to make these two Passover dishes.

As I said, this dish was pretty good. It wasn't amazingly great, though. The apples stayed crisp and sweet, and the cinnamon was a clean and bright note, but the wine was the dominant element in the recipe, giving the haroseth a cloying sweetness and booziness. I found it a bit liquidy too, which suprised me, since I was expecting the apples to soak up more of the wine. In all, I'm glad I made this recipe, and I'm enjoing snacking on it from the refrigerator this week, but I don't think I'll make it again.

Date Cooked: April 4, 2009
Degree of Difficulty: Easy
Rating: B-

*This recipe is not on epicurious.com.

Tuesday, April 7, 2009

130. Mushroom Barley Soup (p. 113)

I used to have an aversion to mushrooms. Maybe aversion is too strong a word. But, I really didn't like them, that's for sure. One of my goals in this Project, however, is to broaden my food horizons, and get over any lingering food hang-ups that I may have. I would have never guessed that a recipe calling for two pounds of mushrooms would turn out to be one of my favorite dishes of the Project so far, but it is.

This recipe is not very complicated, but it does take a couple of hours. First, I soaked some dried porcini mushrooms in some boiling water. While the porcinis were doing their thing, I started cooking some garlic and chopped onions in some oil in my large Dutch oven. When the onions were nice and golden, I added two pounds of sliced white onions and the dried onions. (I skipped the soy sauce called for by The Book ... I'm cooking soy free these days.) Once most of the liquid cooked off from the mushrooms (they give off a lot of liquid) I added some cooking sherry and boiled that until it evaporated. Then I added some chicken broth (store bought, sorry), water, the soaking liquid from the porcinis (strained through a paper towel to get rid of any grit from the dried mushrooms). To that I added some sliced carrots, dried pearl barley and some dried rosemary and tyhme. I let the whole thing simmer for about an hour. Just before serving, I added some salt, pepper and a healthy handful of chopped fresh parsley.

This soup was excellent. I mean, really, really good. It was rich, hearty and intensely flavorful. The barley, white mushrooms and carrots give the soup heft and substance. I enjoyed this soup with some crusty bread and a glass of red wine. A perfect dinner.

One of the things that struck me about this soup was its "meaty" flavor. But how can that be? There isn't any beef in this soup. Well, it turns out that the meaty flavor that we love in steaks and beef stew is umami, one of the five basic tastes sensed by our tongues. Umami is the savory or meaty flavor that we perceive in meat, cheese and fermented foods (like miso). It's the tongue's reaction to glutamates, the amino acids that are plentiful in these foods. Well, two other foods that have lots of glutamates are onions and mushrooms, and there are plenty of them in this soup, meaning plenty of umami and plenty of meaty flavor.

Another food science note. As I mentioned a little while ago, I'm trying to cook wheat-, dairy- and soy-free these days because my three-month-old son's intolerance to one or all of these things is limiting my wife's diet. We decided to give this recipe a try because, according to my Oxford Companion to Food, barley contains much less gluten than wheat. Well, much less was still too much, and little Jack had a reaction (green poo ... not that you asked).

So, that means that I'll be enjoying the three quart-sized containers of leftover soup myself. And, that's just fine by me.

Date Cooked: March 28, 2009
Degree of Difficulty: Easy
Rating: A