Showing posts with label Cookies Bars and Confections. Show all posts

Sunday, November 7, 2010

216. Pecan Pie Bars (p. 694)

Has it really been six months since my last post? Six months! Really?

Being a dad to an almost-two-year-old, and a young lawyer has been pretty hectic these past few months. I have been cooking, but not nearly as much as I used to. I have a backlog of lots and lots of recipes cooked, but not blogged. I'll probably have to do a list-type-post soon. But today, I've managed to find a few minutes to myself while both my wife and son are napping. So, while I watch the Pats lose to the Browns, I'll tell you about something that I made this week.

My office had its first annual dessert bake-off on Friday. Several people at work know about the project, so I have a bit of a reputation to protect when it comes to cooking. I picked this recipe as my entry because it looked like a winner: Crispy shortbread crust with a sticky, sweet nutty topping. How could I go wrong? Well, it went very, very wrong, and alas, I didn't even place in the contest.

There were two problems with the finished product. One was my fault -- I forgot to add the salt. The other problem -- they were a bit overcooked -- I'm blaming on the Book. But I'm getting ahead of myself.

The crust is very easy. Just throw some flour, butter, and light brown sugar in the food processor and blend until it starts to clump a bit. If you're actually paying attention to what you're doing, following the directions, and want the bars to taste good, you'll also put in a 1/2 teaspoon of salt. I, of course absent-mindedly forgot this last ingredient, and wow, what a difference it made in the finished product. The crust had a very odd, flat taste. Salt makes all the difference in the flavor of baked goods.

The crust gets pressed into the bottom of a baking dish and baked until golden. While the crust is cooking, make the topping. Melt some butter in a saucepan and add some light brown sugar, honey and a little cream. Bring it to a simmer and add some chopped pecans. Spread the topping over the crust and bake some more.

The Book says to "bake until bubbling, about 20 minutes." Well, it was bubbling after about 2 minutes. I figured that it couldn't be done yet, so I left it in the over and kept watching and smelling to make sure that it didn't burn. It didn't burn, but it got a bit darker and harder than I think it was supposed to. In fact, after it cooled, the edges were so hard that I was only able to get the middle out. The edges were fused to the baking dish and I had to soak it overnight to get the pan clean.

The bars that I was able to salvage were fine. Like I said, the crust was definitely missing "something," and the topping wasn't great.

I'm thinking about the Pecan Pumpkin Pie for Thanksgiving dessert. Maybe that will go better?

Date Cooked: November 4, 2010
Degree of Difficulty: Easy
Rating: C-

Tuesday, December 1, 2009

206. Stained-Glass Teardrops (p. 681) (Gourmet, unbound, December 2002)

This post is my first contribution to what I think is a really wonderful project. In the wake of the shuttering of Gourmet Magazine a couple of months ago, a few food bloggers--Olga from Sassy Radish, Maggie from Pithy and Cleaver, and Jennifer from In Jennie's Kitchen--decided to launch a collaborative project to keep Gourmet's spirit alive. It's called Gourmet, unbound, and the concept is pretty simple: each month they will publish a roundup of posts from food blogs about recipes that appeared in an issue of Gourmet from that month in any of the six decades of the magazine's run. So, the inaugural roundup this month will feature recipes that were published in any of the magazine's sixty or so December issues.

For my first Gourmet, unbound post, I chose this recipe for Stained-Glass Teardrops that appeared in the December 2002 issue. Actually, these cookies are doing double duty as my contribution to Gourmet, unbound, as well as my contribution to the bakery table at my church's Christmas fair. I chose them because they are festive, seasonal and attractive, all traits that I hope will make them good sellers.

The idea of these cookies is to roll out the dough nice and thin and cut out shapes -- as indicated by the title of this recipe, The Book intends for teardrop shapes -- and then to cut out a smaller shape in the center of the cookie and fill it with crushed hard candy. As the cookies bake, the candy melts and liquefies. As it cools, the candy hardens and forms a colored "stained-glass" window in the center of the cookie. It's a neat little bit of kitchen alchemy.

I made the cookie dough a day in advance. First, I whisked together some all-purpose flour and salt in a bowl. Then I put a stick-and-a-half of softened butter and some granulated sugar in my Kitchen Aid stand mixer. I beat it until it was light and fluffy and then beat in an egg and some vanilla extract. I slowed the mixer and added the flour and salt bit by bit. Interestingly, there's no leavening agent like baking powder or baking soda in this recipe, so, the resulting cookie is very flat and dense. There's also not a whole lot of moisture in this dough, and it gave the Kitchen Aid a real workout. No way a handheld mixer could manage this dough. Once the dough was all mixed, I divided it into three pieces, flattened them into five-inch disks, wrapped them in plastic and put them in the refrigerator to chill overnight (The Book says to chill for at least two hours.)

The next morning, I got ready to make the cookies. First, I unwrapped some sour balls and divided them by color (red, green, yellow and orange) into small zip-top bags. Then, I got some of my frustrations out by smashing the candy to bits with a rolling pin. I put my candy dust aside and moved on to cookie making in earnest.

I took one of the dough disks out of the refrigerator and put it between two pieces of wax paper and rolled it out to about a ten-inch circle. I couldn't find any teardrop cookie cutters like the ones called for in The Book, so I used a three-inch circle cookie cutter to make the outer cut. I placed the round cookies on a Silpat-lined cookie sheet and made the smaller cutouts in the centers of the cookies. I found some Christmas-themed mini cookie cutters at the grocery store, so I used them to cut a Christmas tree, candy cane, gingerbred man or bell out of each cookie. I filled each cutout with some of the candy dust: green for the Christmas trees (duh!), red for the candy canes (ditto), yellow for the bells and orange for the gingerbread men (close enough, right?).

While these cookies were easy enough to make, they were still very time consuming because of equipment limitations. You absolutely have to make these cookies on a silicone baking sheet liner like a Silpat, otherwise, you'd never get the melted candy off the baking sheet. You also have to allow the cookies to cool completely before removing them from the Silpat to allow the melted candy to harden. I only have one Silpat (those things are expensive!), so between cooking and cooling, it took about a half-hour per batch, and with four batches, that's a half a day right there.

The finished cookies were really very pretty, or at least most of them were. Some of the cookies browed too quickly and were a little more "golden" than I would have liked. I also put a little bit too much crushed candy in some of the cookies and it either bubbled over the top of the cookie or seeped underneath, giving less-than-attractive results. But the ones that came out right really did look like little stained glass windows. The Book suggests that these cookies would make lovely Christmas tree ornaments, and I'm sure that they would, but, we've been down that road before, and I'm not going there again. The flavor of the cookies, though, was just ... meh. The sugar-cookie base was tasty enough, but nothing to write home about, and the cookie and hard candy tastes and textures don't really compliment each other all that well. In all, I'm glad I made them to have learned a new technique, but I don't think that I'll make them again any time soon.

Date Cooked: November 28 & 29, 2009
Degree of Difficulty: Medium (time consuming without two Silpats)
Rating: Appearance A-; Flavor B-

Tuesday, July 28, 2009

178. Oatmeal Coconut Raspberry Bars (p. 692)

A few weeks ago, it was my wife's turn to host playgroup. In theory, the purpose of playgroup is for the babies to get to interact with each other. But, I have a suspicion that it's at least as much about the moms getting together to gossip ... and to eat. So, I wasn't surprised when my wife asked me to make something for her to serve to "the girls." I picked this recipe, and hoped they'd like it.

These were great, and pretty easy to make. In fact, I made them on a weeknight, which is a pretty good measure of how simple a recipe is. I usually get home from work pretty late, so, if I'm going to make something before bed, it's got to be quick and easy.

First, I toasted some sweetened, flaked coconut. After some less than stellar results in the past, I'm finally getting the hang of toasting coconut in the oven. The key is to stir it a couple of times while it toasts, and to keep a very close eye on it, since it can burn in a matter of seconds. Next, I pulsed together some flour, brown sugar and white sugar in the food processor. I added some cold butter, cut up into pieced, and pulsed it until a dough began to form. Then I transferred the dough to a large mixing bowl, and using my hands, kneaded in some old-fashioned oats and the toasted coconut.

To assemble the bars, I pressed the dough into the bottom of a baking dish, reserving some for the topping. I spread some seedless raspberry jam over the dough, and then sprinkled the reserved dough over the jam.

After the bars were baked, I removed them from the pan. The Book says to "loosen from sides of pan with a sharp knife, then lift out in 1 piece and transfer to a cutting board." Hmmm, sounds like a disaster in the making. So, to make it easier to remove the bars from the pan, I made an aluminum foil "sling." Before I put the dough into the pan, I lined it with the foil and let the foil overhang the edges of the pan. I was able to just lift the foil sling out of the pan and then cut the bars into 24 pieces.

These bars were delicious. Very sweet, and with a nice crunchiness from the oats and coconut, and a rich gooeyness from the jam. I think that the moms at playgroup liked them. I brought the leftovers to work, where they were gobbled up in a matter of minutes.

Date Cooked: July 6, 2009
Degree of Difficulty: Easy
Rating: A

Monday, July 13, 2009

173. Peanut Butter-Coconut Bars (p. 693)

This is the third peanut-butter-based dessert recipe I've made from The Book, and I'm sorry to report, that this recipe was nearly as disappointing as the other two.

First, I creamed some softened butter and sugar. Next, I added some Skippy regular creamy peanut butter, an egg, some vanilla, a bit of salt and some flour. Finally, I stirred in some sweetened flaked coconut.

I spread the mixture into a buttered baking dish and sprinkled some chopped, salted, dry-roasted peanuts on top. I baked the bars for about 20 minutes and then put them on a rack to cool.

The Book says to cut the bars into 24 pieces, and then to cut each in half diagonally to make 48 small triangles. After I cut the pieces in the picture above, I stopped cutting because they kept falling apart. That's right, just like the two different kinds peanut butter cookies I've already made from The Book, these bars were pretty dry and crumbly. But, maybe it's just me. I brought the bars to work and they disappeared quickly. A lot of people said that they were good, and not dry at all. Either I'm too picky, or my co-workers are too polite.

The flavor was pretty good, though. Plenty of peanut taste. I think that they would have tasted better, though, if the coconut had been toasted a little bit before it was stirred into the batter.

Date Cooked: June 26, 2009
Degree of Difficulty: Easy
Rating: C

Tuesday, June 2, 2009

154. Cranberry Pistachio Biscotti (p. 685)

Before I made this recipe* from Italian baking authority Carol Field, I didn't know that the word biscotti was descriptive of the cooking method for these popular Italian cookies.

You see, biscotti comes from the Latin word biscoctum, meaning "twice-baked," and wouldn't you know, that's just how these cookies are made. For the first bake, the cookie dough is formed into a log and baked. For the second bake, the log is sliced into pieces and baked again until crisp and browned.

I started by soaking some dried cranberries in some boiling water to soften them a bit. Meanwhile, I buttered and floured a large baking sheet. To make the dough, I whisked some flour, sugar, baking soda, baking powder and salt. Then I beat in some eggs and vanila extract. Finally, I mixed in the cranberries and some shelled pistachios. I missed the part of the recipe that said to pat the cranberries dry after draining them. They were still pretty wet when I added them to the dough. It gave the dough an odd, wet, sticky texture. I was worried that I had ruined it, but it all worked out OK in the end. The Book says to turn the dough out onto a floured surface and knead. But because of the dough's stickiness (and my impatience) I just kneaded it right in the bowl.

I divided the dough in half and formed it into two logs. I brushed the logs and baked them until golden. I let them cool a bit and, with a serrated knife, cut the loaves into half-inch slices. I arranged the slices on a baking sheet and put them back in the oven for the second bake.

These biscotti were very good. Just the thing to go with an afternoon cup of coffee. The dominant flavor was the vanilla, which really came through. I would have liked even more cranberries and pistachios to make them even more flavorful. The texture was nice, but I agree with Teena that the second baking could have been longer, since these biscotti were not as crunchy as others I've had. All in all, these were delicious and easy to make. I would definitely make these again.

The Book says that the biscotti keep in an airtight container at room temparature for up to a week. According to Wikipedia, Pliny the Elder said that biscotti would last for centuries. I think that the reality is somewhere in between. I took a few of these biscotti with me to work every day for almost two weeks, and the last one was just as tasty as the first.

Date Cooked: May 17, 2009
Degree of Difficulty: Medium
Rating: A-

*This recipe is not on epicurous.com.

Wednesday, April 29, 2009

142. Chocolate Truffles (p. 696)

Secretary's Day was last week, and I wanted to do something a little bit out of the ordinary for the person who helps me keep it all together at work. So, while other folks in my office gave their secretaries flowers and wine, I made these home made these chocolate truffles for my secretary.

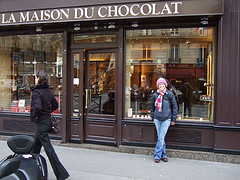
This recipe comes from Robert Linxe of La Maison du Chocolate in Paris.

There are only three ingredients in this recipe: chocolate, cream and cocoa powder. The Book is very particular about the particular brand of chocolate and cocoa to use. Apparently, Linxe uses Valrhona chocolate, and editors of The Book "didn't even think about substituting a more widely available chocolate." Well, I couldn't find Valrhona, and anyway, I've noticed that in recent years, grocery stores have been stocking more and more varieties of premium chocolate with various percentages of cacao. So, I went with Ghirardelli, and I was still very happy with the results.

First, I finely chopped some of the chocolate and put it in a Pyrex bowl. Then I brought some cream to a boil and poured it over the chocolate. I slowly stirred it until the chocolate melted and it was a smooth genache. The Book says to be careful not to stir too fast to avoid incorporating any air into the mixture. I let the genache stand for about an hour until a spoonful scooped from the bowl kept its shape. Then I lined a baking sheet with parchment paper and spooned the ganache into a pastry bag. I piped little mounds of the genache onto the baking sheet and put it in the freezer for a little while.

After the genache set, I melted some more chocolate in a metal bowl set over a saucepan of boiling water. I put some Ggirardelli cocoa powder in a bowl and got myself organized for some candy making. First I put on a pair of disposable plastic gloves. Next, I smeared some of the melted chocolate on one of the gloves. Working one at a time, I rubbed each of the ganache balls with some melted chocolate and dropped them into the bowl of cocoa. I gently lifted the truffles out of the cocoa with a fork and put them into a sieve and carefully tapped off the excess cocoa. I kept working until I had finished all of the truffles and until I was up to my eyebrows in chocolate. Seriously, these truffles are are not particularly difficult to make, but they are messy!

Since I made these as a gift, I was only able to sample a couple of them. And the few that I did eat were amazing. The first thing that you taste is the intense, earthy flavor of the cocoa power. Next, there's the slight crackle of the thin layer of hardened chocolate surrounding the filling. And finally, there's the cool, creamy, rich and velvetly genache. This is a truly luxurious treat. Well worth the effort for a special occaion or a special person.

Curiously, The Book specifically says that you should not try to double this recipe. If you want more, and I do want more, you should make two batches.

Date Cooked: April 19, 2009
Degree of Difficulty: Medium
Rating: A

Tuesday, March 31, 2009

129. Flourless Peanut Butter Cookies (p. 674)

A couple of weeks ago, I made some peanut butter cookies ... and I didn't like them very much. They were dry and hard. I couldn't put my finger on what was wrong with them. My best guess was they there was too much flour in the recipe. Well, if you just flip ahead a few pages in The Book, you'll find this recipe* for Flourless Peanut Butter Cookies. Time to test the theory. As you'll see, I was wrong. It wasn't the flour.

This recipe is very easy to make. Only four ingredients, and you've probably already got them in your kitchen: Peanut butter, sugar, an egg and some baking soda. Beat together the peanut butter and the sugar, and then beat in the egg and baking soda.

The Book says to roll level teaspoons of the dough into balls and put them onto a cookie sheet. This was a little difficult because the dough was pretty dry and crumbly. Then, I flattened the dough balls with a fork (making that distinctive peanut butter cookie cross-hatch pattern) and baked them for a little while.

How were they? They were better than the other peanunt butter cookies ... but not much better. They were dry and crumbly (just like the dough), but at least they weren't hard. They were crisp instead. What I'm looking for, though, is a moist and chewey peanut butter cookie. Is that too much to ask for?

Two very similar peanut butter cookie recipes in The Book, and both were disappointments.

Date Cooked: March 22, 2009
Degree of Difficulty: Easy
Rating: C+

* This recipe from epicurious is not the recipe from The Book. It's actually from Bon Appetit, but it's similar enough. The Book's recipe uses granulated sugar instead of brown, and it omits the chocolate chips and vanilla extract.

Friday, February 20, 2009

108. Triple-Chocolate Fudge Brownies (p. 689)

What's in this recipe?* Chocolate, chocolate, and more chocolate. They are, after all, triple chocolate fudge brownies.

This is the second of the four brownie recipes in The Book that I've made so far. I've said it before, and I'll say it again. Homemade brownies are so easy to make, and so delicious, I'll never, ever make boxed brownie mix again.

To make these brownies, I melted some bittersweet chocolate and some unsweetened chocolate with some butter in a metal bowl over a pot of simmering water. No fancy double boiler necessary. After the chocolate and butter have cooled just a bit, I mixed in some sugar and vanilla extract, and then a few eggs, one at a time. Finally, some flour, a bit of salt, and a generous helping of semisweet chocolate chips (I used big chocolate chunks). I spread the batter into a buttered 13 by 9 inch baking dish and cooked them until a toothpick came out just about clean.

These brownies were excellent. They were moist, chewey and, of course, chocolatey. The Book says that the brownies keep for three days in an airtight container at room temperture. I guess I'll just have to take their word on that since my brownies didn't last that long.

Date Cooked: February 8, 2009
Degree of Difficulty: Easy
Rating: A

*The recipe on epicurious is exactly the same as the one in The Book, except that The Book's recipe is doubled. I wonder if, after the original recipe appeared in the December 1996 issue of Gourmet, readers wrote in to complain that they ate all of the brownies in a single sitting and needed to make another batch right away. To avoid such problems, maybe the editors of The Book just went ahead and doubled the recipe.

Tuesday, February 3, 2009

100. Brown Sugar Fudge (p. 695)

My one-hundredth recipe! I've still got a looooong way to go, but it's a milestone just the same. And to celebrate, how about something sweet?

Growing up, most holidays involved someone bringing out a white cardboard box of chocolates and fudge from Priscilla's Candies in Lawrence. I always went for the chocolate fudge, and turned my nose up at the favorite of the older folks ... penuche ("puh-noo-chee"). Now that I'm older myself, and a bit wiser, I've grown to realize that this sweet, rich, caramel-y fudge should not be overlooked.

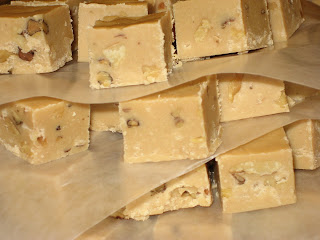
The Book refers to this confection by it's Southern name, Brown Sugar Fudge. Because I'm a New Englander, I'll call it by its (proper) regional name, penuche. Whatever you call it, you make it by bringing some light brown sugar, evaporated milk, butter and salt to a boil and then simmering it until it reaches 238 on a candy thermometer - soft ball stage.

The words "candy thermometer" and "soft ball" were almost enough to make me pass this recipe by. I've never made candy before, and my candy thermometer is an old-school, hand-me-down mercury thermometer encased in a brittle-looking glass tube. But, heck, I'm a man on a mission, and I have to make this eventually. And, anyway, what's the worse that could happen?

So, I cooked the sugar and milk mixture until the thermometer was around 240 degrees (there was no way to know for sure that I was at exactly 238 on my antique thermometer). As it cooked, I kept testing it according to the advice in The Book, drop a small amount in a bowl of cold water, if it holds a soft ball when pressed together, it's ready. The first few of my tests resulted in blobs of caramel dissolving in the water. I was getting discouraged, when all of a sudden, there it was, a soft ball!

Then I transferred the hot sugar and milk mixture to a bowl and beat in some vanilla extract and confectioner's sugar. Finally, I stirred in some toasted chopped walnuts into the fudge. This step is not in The Book's recipe, but the Priscilla's penuche I remember from my childhood had nuts, and that's how I was going to make it. So there!

I spread the fudge into an 8-inch square baking dish and put it in the refirgerator for about an hour. Before I spread the fudge in the pan, I lined it with a piece of heavy-duty foil with the ends overlapping the sides of the pan to form a little sling that I'd be able to use to lift the fudge out of the pan after it chilled .... a little trick I learned from an episode of America's Test Kitchen. After it was nice and hardened, I lifted the fudge out of the pan using the foil sling, and I cut it into 64 pieces.

This fudge was awesome! It was sweet, decadent and creamy. The toasted nuts gave it a nice crunch and additional flavor dimension. Even though this fudge was very rich, it was so good that we couldn't help eating piece after piece. It was a good thing that I brought the fudge to my in-law's house for my wife's grandmother's birthday dinner, otherwise, the two of us could have eaten all of the fudge ourselves ... probably in one sitting.

Since this fudge turned out so well, I'm looking forward to making the other candy recipes in The Book, but not until I get a proper candy thermometer.

Date Cooked: January 17, 2009
Degree of Difficulty: Medium
Rating: A

Monday, January 19, 2009

94. Anzac Biscuits (p. 666)

A few weeks ago, when my wife was in the hospital with our new baby, I wanted to make something to bribe the nurses thank the nurses for all their hard work. I picked this recipe* because it looked good and pretty easy.


This recipe, like so many other traditional favorites, has a great story behind it. According to food lore, these biscuits (I refrain from calling them "cookies" for reasons that I will explain in a minute) are named for the Australian and New Zealand Army Corps (ANZAC), and were first made by Australian wives and mothers to send in care packages to their loved ones fighting overseas in World War I. The texture and ingredients in these biscuits are such that they could withstand the time and turbulence of overseas travel from Australia to the boys fighting at Gallipoli. This quality appealed to me since I wanted to make these treats a few days before we went to the hospital, and still have them be fresh. (Giving the nurses stale cookies, er biscuits, would have had the opposite of the intended effect.)


So, it is with some hesitation that I even use the name "Anzac Biscuits" in this post, since it appears that the Austrailian government is pretty protective of the Anzac name and frowns upon unauthorized use of the term. In 1994, recognizing that the name "Anzac Biscuit" has been in general use in Australia for many years, the government instituted a policy of approving most applications for the use of the term, so long as "the product generally conforms to the traditional recipe and shape, is not advertised in any way that would play on Australia's military heritage, and is not used in association with the word 'cookies,' with its non-Australian overtones." Chocolate-covered Anzac Biscuits, according to the Austrailian government's website, are apparently an abomination with "non-Austrailian overtones" and would not be approved, so don't even think about it.


To make these cookies, I combined some flour, rolled oats, sweetend flaked coconut and salt. Then I stirred together some baking soda and boiling water (watch it fizz!) and mixed that into some melted butter and Lyle's Golden Syrup. (No eggs ... they were scarce during WWI.) Then I combined the wet and dry ingredients. The Book says that the dough will be crumbly, and it is. I put packed tablespoons of the dough onto cookie sheets and baked until golden.

These biscuits are great! They are crisp without being hard. They are buttery and sweet with a nice salty note. The oats and coconut give them a great texture an substance. The nurses were thrilled when I brought these biscuits to the nurses' station on our second day at the hospital. My wife and son received excellent care, and were even discharged a day early. Did the cookies have anything to do with it? I'm sure they didn't hurt.

Date Cooked: December 27, 2008
Degree of Difficulty: Easy
Rating: A

* The recipe in The Book is nothing at all like the one on epicurious.com. Soybean margarine? Really? But The Book's recipe is very similar to this one from the Australian War Memorial website, and which supposedly comes from an ANZAC present at the Gallipoli landing.

Tuesday, December 23, 2008

84. Date Walnut Rugelach (p. 682)

I promised three cookie posts. But, I just couldn't resist the urge to make this recipe* for these delicious treats in honor of Hanukka. So, here's a bonus cookie post, at no extra charge.

Essentially, these cookies are tiny little tarts - little triangles of pie dough filled with dates and walnuts and all rolled up. I've always wondered if there was anything better than pie crust. Well, I've got my answer - pie crust made with crem cheese! First, I combined cut up pieces of cold butter and cream cheese, sugar, salt and flour. I pulsed these ingredients in the food processor until it came together as a dough.

I put the dough out onto my baking mat, broke it into six more or less evenly sized pieces. After a little firsage action, I patted each piece of dough into a small disk and put them in the refrigerator to get nice and firm.

Meanwhile, I made the filling. I took a pound of pitted dates and whizzed them in the food processor until they were nice and finely chopped. I did the same with some walnuts. I mixed the dates and walnuts together with some sugar, cinnamon and vanilla extract.

Next, working one at a time, I rolled out each dough disk into an eight-inch round (I used a dessert plate as a guide for the size). I sliced the round into eight wedges, keeping the wedges together for the time being. I brushed the wedges with some apricot preserves that I had warmed on the stovetop. The Book calls for apricot jam, but I could only find preserves. It worked out just fine, but I think that The Book had in mind something without chunks of apricot. Then I spread some of the filling around on the wedges, leaving some space around the inside and outside edges. Finally, I rolled each wedge up, and put them on a baking sheet, tucking the loose ends under to keep the filling in. Finally, I baked the rugelach until they were puffed and golden.

You often hear about food being so good that it's "dangerous." But, other then fugu, most food isn't really dangerous. Rugelach just might be an exception. Rugelach is served at Hanukkah to commemorate the bravery of Judith, the biblical heroine who ingratiated herself with an enemy general by feeding him cheesecakes and pancakes. Once he was lulled into a stupor by all that she had fed him, she cut his head off. So, you just might think twice when someone offers you rugelach. But just try and resist them.


Date Cooked: December 21, 2008
Degree of Difficulty: Medium
Rating: A-

*The recipe in The Book is very similar to the one on epicurious, but some of the proportions are a little different.

Monday, December 22, 2008

83. Pignoli Cookies (p. 683)

My favorite cookies in the whole world come from the little Italian bakery at the end of my street. They are crispy on the outside and soft and chewy on the inside, and they have an amazing almond flavor. I've always wanted to make them, but I could never find a recipe. In fact I don't even know what they're called, since I just ask for "those little almond cookies."

Well, thanks to this recipe, I can make "those little almond cookies" whenever I want. The key to these cookies is the almond paste, which, The Book emphasizes, is not marzipan. I'd never seen almond paste before, so when I found it in the store, I was at first surprised by how light the can was for its size. Then when I opened it, I was further surprised that it had the look and texture of those gum erasers that artists use.

I crumbled up two cans of the almond past into my food processor, and combined it with some confectioners sugar, and pulsed it until it was ground into a fine meal. Then I transfered the mixture into a bowl and beat in some egg whites and honey. (Much to my surprise, there is no flour in these cookies.) This is one of those recipes that I really wish I had a stand mixer for. The Book says to beat for five minutes. The dough was pretty thick, and after about the third minute, my handheld mixer was struggling. I called it quits at about four minutes when my mixer started to smell like smoke. In the end, it was all right, although, I think a little more beating at a higer speed (which a stand mixer could have done) would have made the cookies a little airy-er.

I spooned the dough into a pastry bag and piped little rounds onto parchment-lined cookie sheets. I pressed pine nuts into the top of each cookie. (At first I started making a pretty starburst design with the pine nuts, but after the second dozen, I moved on to a more abstract "sprinkle them and press them wherever they land" design.) I cooked them for the full fifteen minutes called for in The Book (some trays took a couple more minutes to turn golden). Then I slid the parchment onto racks to cool, and when the cookies were cool enough to handle, I peeled them off the parchment paper.

I made these cookies as a gift for my grandmother, who also loves "those little almond cookies." She was thrilled. They are exactly the same as the ones from the bakery down the street. The only difference is that the bakery puts slivered almonds on top instead of pine nuts. I like pine nuts, but I prefer the almonds on these cookies, and that's how I'll make them next time. That, and I'll wait until I have a stand mixer to make them again, because I don't think that my electric hand mixer could survive another batch of these. (Are you listening, Santa?)

Date Cooked: December 13, 2008
Degree of Difficulty: Easy
Rating: A-

Friday, December 19, 2008

82. Spice Sugar Cookies (p. 669)

My dad is one of ten children, and every year, his brothers and sisters and their families have a huge Christmas party. About 100 people come to the party. We rent a hall, and my cousin, who has a catering business, cooks a meal for everyone. But dessert is a pot-luck affair. All of the nieces and nephews bring something for the dessert table.

This year, I made these cookies as my contribution to the array of sweets and treats. I picked this recipe* because it looked easy and tasty. It was both.

To make the dough, I started by sifting together some flour, baking soda, and spices (a hefty amount of cinnamon and ginger, plus some cloves) and a little bit of salt. Then I beat together some vegetable shortening and brown sugar. Then I added an egg and some molasses. Finally, I added the flour mixture, bit by bit, until it was all blended together. Finally, I put the dough in the refrigerator for an hour to firm up.

I made the cookies by rolling tablespoons of dough into little balls and dipping the top half of each ball in sugar. The dough was very dense, but easy to work with. As the dough balls baked, they melted into perfectly rounded cookies with cracked, sparkling tops. They smelled great as the cooked and cooled on racks on the counter.

The Book says that the yield of this recipe is three dozen cookies. But I was pleasantly surprised when I was able to get almost four dozen cookies from one batch of batter. This was great, because after filling up a respectably-sized cookie tray for the party, I was able to save more than a few cookies for myself.

These cookies were great. They are nice little ginger snaps. Sweet and spicy, crisp without being hard or dry. They are exactly what you want to eat with a glass of eggnog.

Date Cooked: December 6, 2008
Degree of Difficulty: Easy
Rating: B+


*This recipe, under the name "Ginger Sugar Cookies," is the cookie of the year for 1965 in Gourmet's Favorite Cookies: 1941-2008 web feature.

Thursday, December 18, 2008

81. Gingerbread Snowflakes (p. 680)

This is the first of three cookie posts. And with Christmas right around the corner, it seems like just about everyone is in a cookie-making mood.

The current issue of Gourmet features an array of stunningly beautiful cookies including some glittering lemon sandwich cookies that I can't wait to make. But the fine folks at Gourmet didn't stop there, the editors and test kitchen cooks went through the archives to compile a web feature of the best cookie recipe from the magazine for each year since 1941. I can't think of a more mouth-watering way to spend a half hour than to scroll through these sixty-plus recipes. Well, it didn't take long for a few intrepid food bloggers to see Gourmet's cookie-of-the-year feature as a challenge. And thus, The 12 Cookies of Christmas: A Gourmet Cookie Extravaganza was born. I'm looking forward to catching up on the efforts of Sandy from At the Baker's Bench and her friends who decided to pick and make their 12 favorite recipes from Gourmet's "best of" collection. (Hat tip to Michelle of What Does Your Body Good? for pointing me to the Extravaganza.)

OK, enough about other people's cookies. I want to talk about my cookies. I volunteered to make some cookies for my church's bake sale. I picked this recipe because I could make the cookies ahead of time, since, according to the Cook's Note, the cookies keep up to three weeks. In theory, this is a pretty easy recipe. The Book says that the start-to-finish time is 2 1/4 hours. But because I tend to make my own problems, and bite off more that I can chew, it took me about eight hours, over the course of three days to make these cookies. My downfall was reading The Book's suggestion of turning the cookies into ornaments and thinking, "That sounds like a good idea!" They came out great, but it took forever to make them.

The cookie dough is pretty easy to make. First, I combined some molasses, brown sugar and spices (ginger, cinnamon, allspice and cloves) in a saucepan and brought it to a boil. Right from the first step, this recipe fills the house with an instant Christmas aroma. Off to a great start! Next I added the baking soda, and like an elementary school science project, the mixture foamed up furiously. (Good thing The Book warned me that was going to happen.) Then I added butter, an egg and the flour and mixed it right in the pan until I had a big ball of cookie dough.

I turned the dough out onto my baking mat and kneaded it for a little while. Then I put half of the dough into the refrigerator while I worked on the other half of the dough. I rolled the dough out nice and thin, and cut out as many snowflakes as I could. I rerolled the leftover dough to cut out more cookies, and then I rerolled it a few more times until I made all of the cookies I could. The Book says to reroll the dough once, presumably because it could get tough if it's rolled too many times. But I took my chances since I didn't want to waste any dough. All of the cookies I tasted were great, so I don't think that the multiple rollings did any harm.

To make the cookies into ornaments, I poked a hole in each cookie with a drinking straw before I put them in the oven. After the cookies cooled, I threaded a thin red or green ribbon through the hole and tied it in a bow. This was very tedious, and about halfway through the four dozen cookies the recipe yielded, I was rethinking the wisdom of making cookie ornaments.

Next came the decoration. This recipe for decorating icing is a sub-recipe to the cookie recipe. It's pretty easy. Just combine a box of confectioner's sugar, powdered egg whites, water, lemon juice and vanilla extract. I didn't know that powdered egg whites existed, but I'm glad that they do, because the egg whites are necessary to give the icing its structure and stiffness, but I'd be nervous about using uncooked egg whites in cookies destined for a church bake sale. I can see it now: "Parishioner sickens dozens of churchgoers with salmonella-laced snowflake cookies. Film at eleven."

I opted for a pretty simple, less-is-more approach to decorating the cookies. There was more than enough icing to completely cover the cookies. But, I decided that because of my limited time, and my limited skills with a pastry bag, I'd keep it basic. Some might disagree, but I actually thought that the cookies were better for it. The cookies, as cookies, were delicious in their own right. Nice and crispy on the outside and chewy on the inside with a really nice mix of holiday spices. Exactly what you'd want in a gingerbread cookie. The icing, on the other hand, while sweet, was pretty blah, even with the lemon juice and vanilla. So, by keeping the decoration to a minimum, the cookies were able to shine whithout being overwhelmed by too much icing.

After the icing hardened, I put each of the cookies in an individual plastic bag fastened with a silver twist-tie. Again, about an hour into this part of the process, I was asking myself exactly why I though that it would be a good idea to do this way. In the end, the cookies were beautiful and delicious, if I do say so myself. I'd make this recipe again, but without all of the unnecessary fuss of making them into ornaments.

Date Cooked: November 30 - December 3, 2008
Degree of Difficulty: Medium (but VERY time consuming)
Rating: B

Saturday, September 13, 2008

47. Black-and-White Cookies (p. 666)

As any fan of Seinfeld will remember, this recipe plays a pivotal role in the classic episode, "The Dinner Party." While on an unsuccessful quest for a chocolate bobka to bring to a dinner party, Jerry spots a black-and-white cookie in the bakery's display case. He can't resist getting one and rhapsodizing on how the cookie is an allegory for racial harmony. "I love the black and white," he says, "Two races of flavor living side by side. It's a wonderful thing isn't it?" "Nothing mixes better than vanilla and chocolate," he goes on, "And yet somehow racial harmony eludes us. If people would only look to the cookie all our problems would be solved." But Jerry's idealism is dashed when the black and white halves of the cookie can't get along in his stomach, bringing an end to his fourteen-year vomit-free streak. But even if these cookies aren't the answer to society's problems, they are delicious.

The base of these tasty treats is a cake-y, tangy buttermilk cookie batter. I've already complained about how much I hate it when recipes call for a small amount of buttermilk. Well, I think that I've discovered the answer to my problem. While wandering up and down the baking needs aisle of my local mega mart, my eyes were drawn to the friendly smile of a mustachioed chef on a tub of powdered buttermilk. Powdered buttermilk?!? With a little bit of water, I can instantly have any amount of buttermilk called for by a recipe. No more wasted buttermilk for me! Once the cookies are baked and cooled, it's on to the best part: the icing.

The icing is simple and delicious. It's just confectioners' sugar, light corn syrup, vanilla extract, a little water, and the key ingredient, lemon juice. Divide the icing in half, and add some Dutch-process cocoa to one half, and leave the other half as is. (I'm still using my non-Dutch Hershey's cocoa. My local mega-mart only sells Hershey's and a store brand of unalkalized cocoa.) Start by frosting one half of each cookie with the white icing. Then frost the other half of the cookies with the chocolate. As the frosting dries, the black and white frosting kind of merge together at the margin making a perfectly smooth and shiny icing. These were some good-looking cookies, if I do say so myself.


Not only were these cookies good looking, they were tasty, too. The cookies have a nice cake-y texture and the buttermilk gives them a nice tang. The icing is sweet and cool, and the lemon juice gives them an unexpected brightness and zip. The only problem with the recipe is that it only makes eight cookies. They're big cookies, but all the same, once they were gone, I was already wanting more. So, if you're looking for a treat, this is a great one to try. And as Jerry Seinfeld said, "Look to the cookie, Elaine. Look to the cookie." Maybe we can learn something from these cookies, but at the very least, it's delicious to try.


Date Cooked: August 30-31, 2008
Degree of Difficulty: Medium
Rating: A-

Tuesday, August 26, 2008

43. Lemon Bars (p. 691)

Ever since Kevin gushed about this recipe, I've been looking forward to making these lemon bars. And do you know what, he was right, they're fantastic!

The base of these bars is a simple shortbread made by pulsing together flour, sugar, cold butter and just a bit of salt. The result is a coarse meal that you press into the bottom of a baking dish. The Book calls for a nine-inch square baking pan. I don't have one (and neither does Kevin, so I wonder if it's an odd size?) so I improvised by using a rectangle pan with almost the same surface area (I knew that grade-school math would come in handy for something someday). The shortbread bakes in the oven for a while until "pale golden brown."

While the shortbread is baking, it's time to make the lemon custard. The Book's directions are simple ... perhaps too simple. All it says is "Whisk together eggs, granulated sugar, flour, heavy cream, zest, juice and salt in a bowl until combined." So, that's what I did. I just dumped all of the ingredients in a big bowl and started whisking away. The result was lumpy with little globs of eggy flour floating throughout. It took me a while to get it smoothed out. Next time I make these (and there will be a next time ... these things are great!) I'll add the ingredients one at a time to make sure that they all get incorporated evenly. The custard is poured over the baked shortbread and the whole thing goes back in the oven until the custard sets.

Once completely cooled (in the refrigerator for at least four hours), cut into 24 bars, dust with confectioner's sugar and enjoy. These bars were excellent. The shortbread crust was sweet and buttery with just the right density. The lemon custard was zesty without being too puckery, and sweet without being cloying. A perfectly balanced bar, and just the thing to end any springtime or summer dinner.

Date Cooked: August 16, 2008
Degree of Difficulty: Medium
Rating: A

Thursday, August 14, 2008

40. Dark Chocolate Shortbread (p. 688)

As I was flipping through The Book this past Sunday morning, I came across this recipe, and I decided to make it on the spot because I happened to have all of the ingredients on hand and it looked pretty easy to make.

The short list of ingredients is made up of all "pantry items" like butter, superfine sugar, vanilla, salt, all-purpose flour and Dutch process cocoa powder. I wasn't sure whether the Hershey's coca powder in my cupboard was "Dutch process" or not, so I took a chance. Apparently, I was wrong. Dutch process cocoa is treated with an alkali to neutralize its natural acidity. Hershey's is unalkalized, but I don't think that it made a difference, since I thought that the shortbread came out just fine. Based on what I read on the Internets, the Dutch/non-Dutch issue probably only makes a big difference when you need it to cooperate with baking powder, and when you want to make sure that the chocolate taste isn't too bitter.

You start by mashing the softened butter, sugar, vanilla and salt together with a fork (I used a potato masher, 'cause I wasn't messin' around). Then you sift the flour and cocoa over the mixture and keep on mashing until it forms a soft dough. You divide the dough in two and pat it into two six inch circles on an ungreased baking sheet. (Yes, I used a ruler, do you wanna make something of it?) You put the baking sheet, uncovered, in the refrigerator for about a half hour for it to firm up a bit. When my wife saw the baking sheet with two circles of dough on it, she asked, sensibly enough I guess, "Are you making one for me and one for you?"

Then you put it in the oven for 15 minutes "until centers are dry to the touch and edges are slightly darker." I was a little concerned about this because I was using a non-stick baking sheet, which has a tendency to make things brown too fast, so I kept an eagle-eye on my oven temperature, and I pulled the cookies out before they got too crispy around the edges. You cool the shortbread on the baking sheet for about ten minutes, and then, while it's still warm, you cut each round into eight wedges with a large, heavy knife. I did this very carefully so as not to scratch my baking sheet. Then you transfer the wedges to a rack to cool completely.

I liked these cookies quite a bit. They were buttery and chocolatey with that familiar shortbread texture. While they were very crumb-y, they weren't too fragile. (My wife even made a little ice cream sandwich by putting some vanilla-fudge ice cream in between two wedges. Yum!) I though that they tasted like flat, crispy brownies. My wife said that they were like "fancy Oreos." Either way, they were pretty good and they're easy enough to satisfy an emergency chocolate craving if you've got some basic ingredients on hand and about an hour to spare.

Date Cooked: August 10, 2008
Degree of Difficulty: Easy
Rating: B

Tuesday, July 22, 2008

26. Katharine Hepburn's Brownies (p. 688)

Legend has it that the infamous gossip columnist , Liz Smith, wrestled this brownie recipe from Katharine Hepburn, the irascible star of two of my favorite films, Desk Set and The African Queen. The Book's version of the recipe comes from food writer Laurie Colwin, who got it from a friend. Apparently, the brownies are a (formerly) secret Hepburn family recipe.

But, the recipe is not without controversy. Not long after Ms. Hepburn passed away in June 2003, a flurry of spirited letters to the editor about the recipe appeared in the pages of The New York Times.

The first was Heather Henderson's fond memories of Ms. Hepburn (who was a neighbor) giving her a stern lecture (over tea and brownies) about staying in school. Henderson included a version of this recipe in her letter. Frederick M. Winship wrote to the Times to protest Henderson's inclusion of cocoa(!) instead of chocolate in the recipe. He wrote that Ms. Hepburn "would never have substituted an ingredient as anemic as cocoa for real, unadulterated chocolate." Winship claimed that Ms. Hepburn gave the real recipe (which is identical to the one in The Book) to his wife when the two women acted together. Henderson defended herself with a response to Winship's letter. She claims that she and her father specifically discussed the cocoa/chocolate issue with Ms. Hepburn herself, and the actress agreed that it didn't make any difference. The key to the recipe, Henderson explains, is the small amount of flour, just a 1/4 cup, which produces the fudgy, chewy texture.

Well, whatever the actual source and formula of the recipe, it's beyond dispute that that the brownies are great. They couldn't be easier to make. You start by melting two ounces of unsweetened chocolate (or cocoa if you're in Henderson's camp) and a stick of butter together in a saucepan. Then you take it off the heat and beat in the sugar, eggs and vanilla. Stir in the flour. Finally fold in the chopped walnuts. (The Book says that they're optional, but brownies aren't brownies without nuts.) The best thing about this batter is that you can make it right in the pan. No mixing bowls to clean! Pour it all into a buttered, floured baking pan and cook until a toothpick comes out clean.

These are the quintessential brownies. Nothing special or fancy, no gimmicks. Just pure, rich and fudgy flavor with the chewey texture and that papery-thin, crackled top that all great brownies have. I will never, ever make brownies from a box again!

Just like Katharine Hepburn herself, these brownies are a timeless classic.

Date Cooked: July 19, 2008
Degree of Difficulty: Easy
Rating: A

Thursday, July 17, 2008

24. Oat Lace Cookies (p. 665)

Last weekend, I decided to treat myself to one of the items on my Kitchen Wishlist. (See the list on the left if you're looking for a gift for your favorite cook-through blogger. Hint, hint.) I am now the proud owner of a Silpat!

I decided to make these Oat Lace Cookies as my inaugural Silpat cooking experience. The Silpat worked exactly as I hoped and dreamed it would, and I'm looking forward to keeping it in regular rotation in the kitchen. The cookies on the other hand, were much less impressive.

The recipe is fairly easy. It's just a few ingredients (butter, sugar, toasted oats) stirred together on the stove. Then you put two-teaspoon mounds of the mixture on your Silpat and pop them in the oven for a little while. The batter melts, spreads and hardens into lacy, crisp and delicate cookies that, according to The Book, are special enough to serve to company.

Well, my first batch wasn't company-ready. I followed the directions about how much batter to use and how far apart to put the cookies, but they fused together into one giant cookie. The same thing happend to Teena when she made these, so I know it's not just me. As I took them off the cookie sheet, they broke up into a bunch of cookie-shards.

For the remaining batches, I made the batter mounds half the size (one teaspoon) and put them even farther apart. The results were better. At least the cookies didn't fuse together, but they still broke when I lifted them off the cookie sheet. This wasn't the fault of the Silpat. They didn't stick at all, they were just too fragile, and cracked as I tried to lift them. In the end, I only had three photo-worthy cookies out of an expected yield of eighteen.

After all of that, how do they taste? Just OK. Overall, the flavor was good: sweet and caramel-y, but I thought that they were way too buttery. Also, even though the oats were toasted, they had a kind of "raw" taste. Finally, these come across much more as a candy than a cookie in terms of texture and taste. Definitely not my favorite so far.

Date Cooked: July 13, 2008
Degree of Difficulty: Pretty Easy
Rating: C

Monday, June 23, 2008

6. Brown Sugar-Ginger Crisps (p. 665)

A few weeks ago, I made these Lemon-Glazed Candied-Ginger Cookies from the June issue of Martha Stewart Living. Since then, I've been looking for something to do with the rest of the huge tub of candied ginger that I bought to make Martha's cookies.

I scoured The Book's index for recipes that called for candied ginger, and I came across these cookies. This recipe is pretty similar to Martha's in terms of ingredients and flavor, but in terms of labor, The Book's recipe is much easier. Martha, being Martha, calls for chilling the cookie dough, rolling it out to a 1/4 inch thickness, and cutting it into perfect little rounds. The Book simply asks you to drop teaspoons of dough (more about that later) onto a cookie sheet. The lemon icing drizzled on top of Martha's cookies, however, is a nice touch that makes her the winner of this battle in the cookie wars, though. Sorry, Gourmet.

Don't get me wrong, these cookies are very tasty. They're crisp and buttery. The sweet, spicy, and chewy bits of candied ginger add interest to the cookies, but, there wasn't enough ginger flavor - even after following Kevin's advice and adding a teaspoon of ginger in place of the 1/4 teaspoon called for in the recipe.

Now, let me rant for a moment about cookie recipes in general. Ever since I made my first batch of Nestle's Toll House Chocolate Chip Cookies as a child, I have never been able to produce the number of cookies promised by any cookie recipe. This recipe was no exception, but I don't think that it's my fault. The Book says that this recipe yields "about 7 dozen cookies." For those of you who, like me, never memorized your multiplication tables, that's 84 cookies. How's that possible? It's because The Book instructs you to drop teaspoons of the dough onto the cookie sheet. After my first batch, I thought, this has to be a mistake. I never realized just how small a teaspoon is. So, after the first batch of mini-cookies (see the top cookie in the photo to the left), I tossed the teaspoon aside, and I plopped heaping dessert spoons of dough on the cookie sheets. To paraphrase Crocodile Dundee, "That's not a cookie, THAT'S a cookie." Needless to say, my yield was nowhere near seven dozen, but that's OK by me.

Date Cooked: June 19, 2008
Degree of Difficulty: Medium
Rating: B